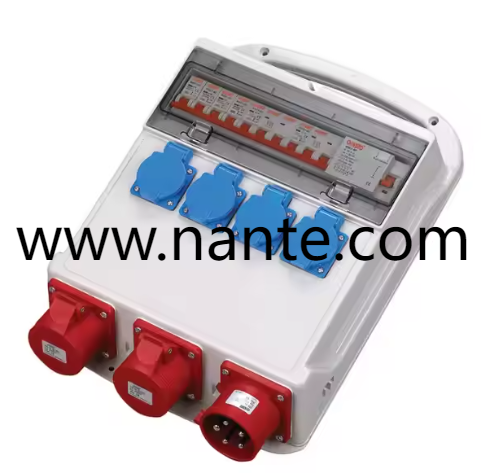
When a wall mounted outlet enclosure shows visible cracks or fails to hold tight seals, replacing an Electrical Socket Box becomes a practical safety step rather than a chore. Homeowners and facilities managers who face weather damaged housings, corroded terminals, or loose covers often worry about downtime and cost. A careful, methodical replacement restores safe connections, reduces shock risk, and brings old installations up to current installation practice without a full system overhaul.
Start by assessing the condition. Look for brittle plastics, rusted screws, or gaskets that no longer compress. If the cover warps or latches no longer engage, water and contaminants can enter and damage wiring. In garages, patios, and external utility closets, these weaknesses accelerate failure when exposures repeat. Take photographs and note part numbers so you can match a replacement with the right footprint and mounting offsets.
Power isolation is non negotiable. Before any work, shut off the supply at the correct upstream device and verify the circuit is dead with a non contact tester and then with a reliable meter. Lockout procedures protect household members or coworkers while the task proceeds. If permits or local rules require notification, secure approvals before energizing again to avoid compliance issues.
Selecting a substitute unit means matching form and function. Choose an enclosure that accepts the same conductor sizes and that has compatible knockout patterns so you avoid rerouting conduits. Pay attention to ingress resistance rating and to lid hardware that resists tampering. For outdoor or washdown sites, choose a sealed face design with a replaceable gasket and sturdy latch. If the site calls for mixed power and data, a multi module face arrangement saves space and keeps routing tidy.
Removal of the damaged assembly should proceed carefully. After isolation, loosen mounting screws and free cables from terminals. Label each conductor with tape and marker so reconnection is straightforward. Inspect the conductors for abrasion or discoloration and trim back to healthy insulation when needed. Replace degraded terminals or ferrules to preserve clamping reliability and avoid resistive heating at reconnection points.
Wiring the new unit demands attention to torque and neat routing. Terminals that accept proper conductor cross sections reduce mechanical stress and improve contact area. Use the torque settings recommended by the enclosure or device manufacturer to avoid under tightened or over stressed connections. Route cables with appropriate bend radius and secure strain reliefs to prevent movement that could loosen screws over time.
Grounding completes safe replacement. Bond the enclosure to the site earthing system using a dedicated conductor and approved clamp. For metal cabinets this is especially important since the chassis must remain at protective potential. Ensure that bonding points are clean and that hardware shows no signs of corrosion. For polymer cabinets include a clearly marked grounding stud or plate to accept the green conductor.
After mechanical and electrical reconnections, exercise protective elements. Reset ground leakage units and verify trip function using the test feature. Check that arc detecting devices and surge suppressors remain serviceable if installed. Verify that covers latch reliably and that any locking or tamper resistant hardware operates smoothly. Close the enclosure and apply a small amount of sealant around external cable glands if local conditions call for added protection against ponding or wind driven moisture.
Testing under load is the final verification step. Energize the circuit and use a clamp meter or portable power analyzer to confirm current distribution matches expectations. Scan terminals with an infrared camera if available to identify resistive joints that may run warm under load. Listen and observe for any unusual sounds or smells that would indicate a problem. Document readings and include photos in maintenance records for future reference.
Maintenance planning prevents recurrence. Keep spare gaskets and fasteners in a parts kit and note supplier details for future replacement. Schedule periodic checks that include tightening fasteners and inspecting seals. When selecting new components, consider vendors that publish clear installation notes and offer accessory packs that match the unit you installed, simplifying future work.
If the project exceeds personal comfort or scope, consult a licensed electrician. Complex panels, multi circuit feeds, or service upgrades need professional oversight to ensure compliance and long term safety. For teams specifying enclosures or planning multiple replacements, choosing configurable products and sourcing accessory kits simplifies logistics and speeds field work.
For those seeking replacement units with clear installation guides and accessory support, configurable models and documentation are available from established suppliers. Explore product series, mounting accessories, and seal kits at https://www.nante.com/product/ , where technical notes and parts lists help match a replacement to the original footprint. The site also provides channels for technical assistance and for ordering spare items that reduce downtime during future maintenance cycles.

